

How to Install SPC Wall Panels Using Construction Adhesive
SPC wall panels are widely used in residential, hotel, office, bathroom, and commercial spaces due to their waterproof, moisture-proof, durable, and quick-installation properties. Compared to traditional wall decoration materials, SPC wall panels eliminate the need for complex wet work, resulting in a shorter construction period and easier maintenance.
While SPC wall panel installation is not complicated, achieving a smooth, aesthetically pleasing, and durable finish still requires following the correct installation process. From wall preparation and panel layout to caulking, installation, and edge finishing, each step affects the final quality.This article will introduce the most common adhesive installation method for SPC wall panels, helping you quickly understand the standard installation process.
Preparation Before Installation
To do a good job, one must first have the right tools. Before starting, prepare all necessary tools and materials:
- structural adhesive, level (or laser level), rubber mallet, utility knife or cutting machine, measuring tape, pencil, and spacers.
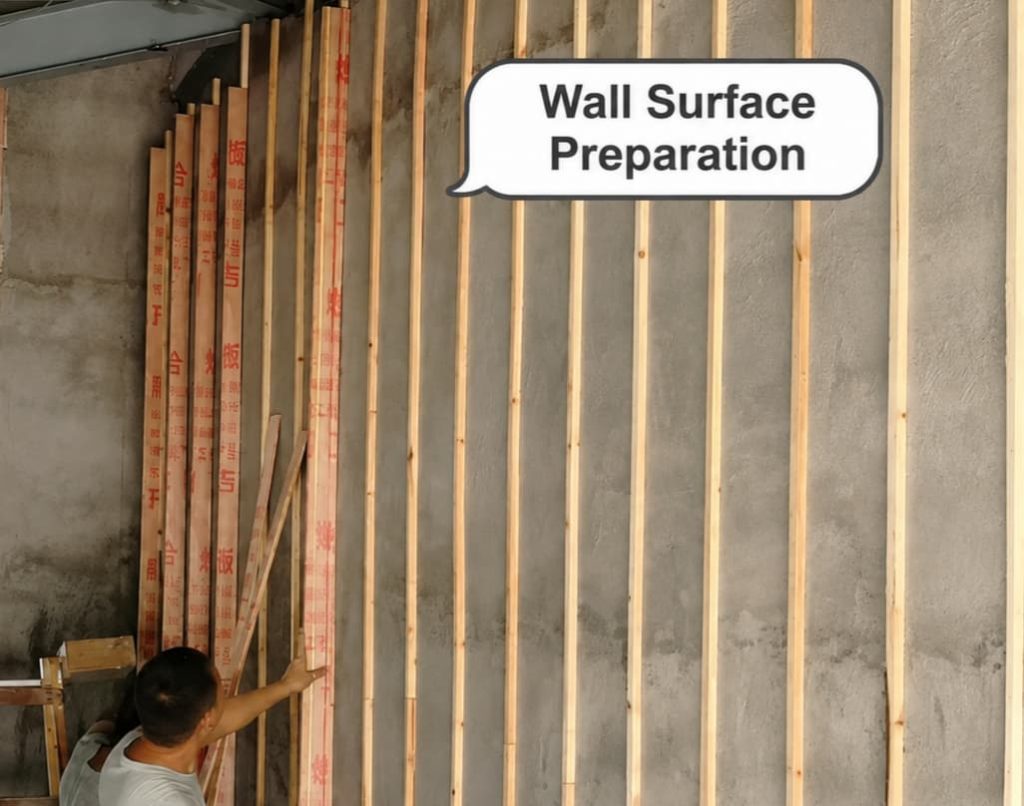
- The wall surface must be dry, clean, free of hollow areas, and free of obvious oil stains.
- The panels should be left to stand at the installation site for at least 24 hours to acclimate to the indoor temperature and humidity.
- Prepare matching edge trims and baseboards.
The quality of the structural adhesive directly determines the strength of the installation; it is recommended to choose a product with strong initial tack and good weather resistance. For specific recommendations, please refer to our structural adhesive recommendations.
Detailed Installation Steps for Adhesive-Backed Installation
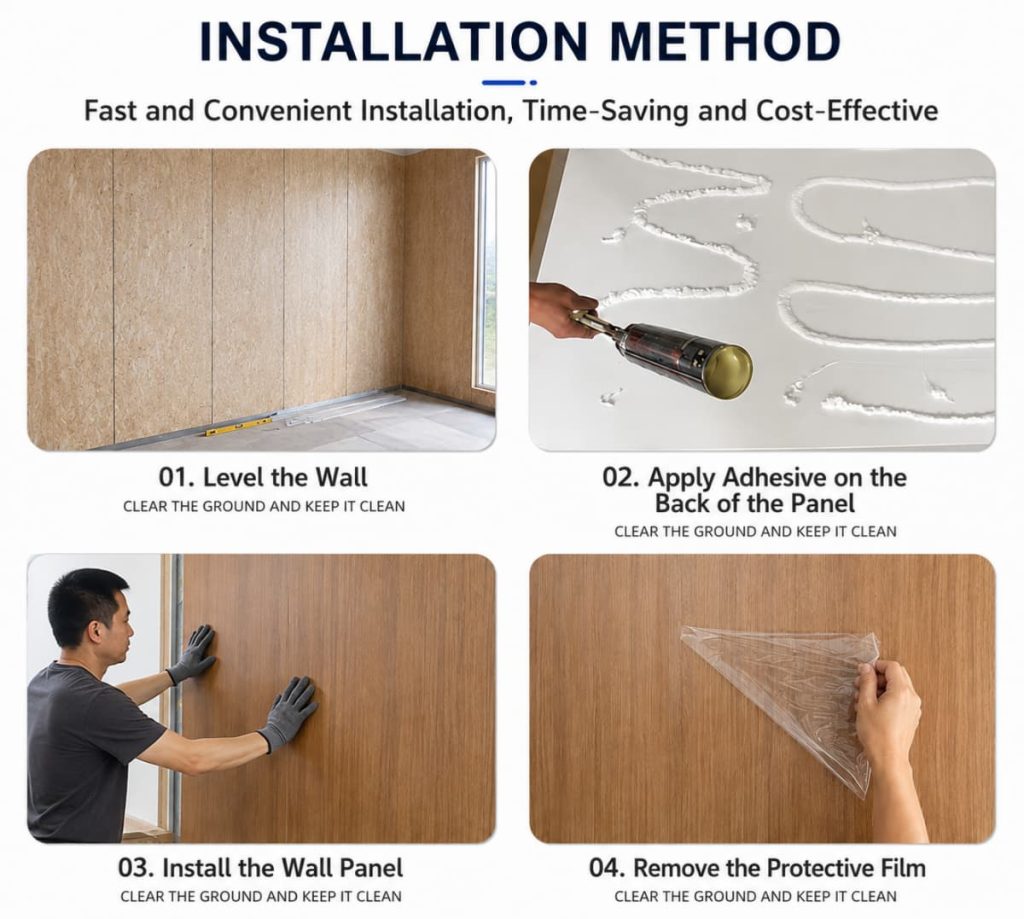
1. Wall Leveling
This is the foundation of the entire installation. First, check the flatness of the wall surface and level any areas with significant errors. Use a level to draw horizontal and vertical reference lines to determine the installation position of the first row, and leave a 5-10mm expansion joint around the perimeter to prevent arching or cracking due to thermal expansion and contraction later.
The positioning of the first row is particularly critical; if it is not level, the entire wall will be tilted.
2. Panel Splicing and Back Adhesive Application
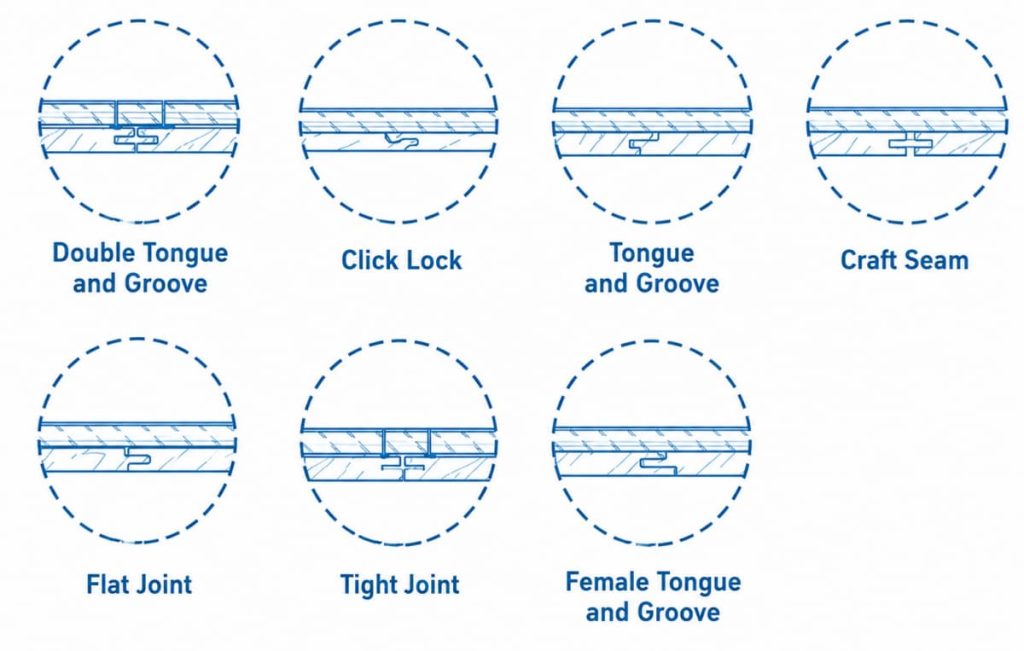
Panels can be connected using interlocking clips, male-female grooves, or direct flat joints. First, roughly align the panels to be spliced.
The key is applying structural adhesive to the back of the wall panels. Common application methods include dot application, strip application, or a zigzag pattern. It is recommended to apply at least 5 adhesive dots per panel, with a spacing of no more than 300mm between dots and no more than 150mm at the edges. Ensure all four corners and the center are covered. Use a moderate amount of adhesive, ensuring sufficient adhesion while avoiding excessive extrusion that would affect aesthetics.
3. Attaching the wall panels to the wall
Starting with the first row, align the glued panels with the baseline and press firmly against the wall. Gently tap with a rubber mallet or press with your palm to ensure full contact between the adhesive and the wall. During installation, use a level to check the flatness and verticality frequently. Fine-tuning can be done before the adhesive is fully cured.
4. Edge Finishing
Edge finishing is crucial for enhancing the overall effect; poor finishing can easily leave regrets.
Inside and Outside Corners
Inside and outside corners are the corners of walls. Common finishing methods include:
- Folding the wall panel directly into the inside or outside corner (requires professional equipment and craftsmanship)
- Covering with inside and outside corner trim
- Using a matching curved trim for outside corners for a softer visual appearance and better safety
- Matching outside corner trim
Using the manufacturer’s matching trim is highly recommended, as it is easy to install and provides a more unified color and texture.
Edge Finishing with Ceiling and Floor
- At the junction of the top and ceiling, use an L-shaped or dedicated ceiling trim to cover the expansion joint.
- Use baseboards to finish the bottom, which can cover the bottom expansion joint and protect the bottom edge of the panels.
- Matching trim can also be used at door and window openings for a cleaner and neater look.
5. Remove Protective Film and Conduct Final Inspection
After all wall panels are installed, do not rush to finish the work. It is recommended to conduct a final overall inspection.
The inspection should include:
- Whether the wall panels are firmly attached to the wall
- Whether the joints are even
- Whether the panel surface is flat
- Whether the edges are intact
- Whether there is any residual adhesive that needs to be cleaned
After confirming that everything is in order, then remove the protective film from the surface of all wall panels. This will prevent scratches on the finish during construction and ensure that the final wall surface remains clean.
Five Common Mistakes to Avoid When Installing SPC Wall Panels
To achieve better installation results, it is recommended to avoid the following problems:
- Unleveled wall surface: This can easily lead to hollow panels and uneven joints.
- Inadequate layout planning: The last panel may be too narrow, affecting the overall aesthetics.
- Uneven application of structural adhesive: This reduces bonding strength and may cause localized detachment.
- Improper panel splicing: This results in noticeable seams or height differences.
- Neglecting edge finishing: Edges are prone to dust accumulation, moisture damage, or damage from impacts.
Summary
The core of the adhesive installation method is quite simple: ensure the wall is level and flat, apply the structural adhesive properly, press and glue the panels firmly, and then handle the corners and the junctions of the ceiling and floor properly. This will result in a smooth, sturdy and aesthetically pleasing wall surface.