

WPC Wall Panel Installation Guide: Step-by-Step DIY Installation for Interior Walls
During the renovation process, more and more households and commercial spaces are choosing WPC wall panels (Wood Plastic Composite Wall Panel) as the wall decoration material. Compared with latex paint, tiles or wood veneer, WPC wall panels have the advantages of quick installation, waterproof and moisture-proof, easy cleaning, and low maintenance cost. Even users without rich renovation experience can complete the installation following the standard procedures.
If the installation method is correct, it not only can shorten the construction period but also effectively reduce labor costs, making the wall surface smoother, more beautiful and durable. This article provides the most practical and detailed indoor installation comprehensive guide, covering material selection to common problem solutions, step by step teaching you the professional-level effect. Follow it, even ordinary DIY enthusiasts can complete a beautiful feature wall on the weekend!
Table of Contents
Why Choose WPC Wall Panel for Interior Decoration?
WPC Wall Panel is made by combining wood fibers with high molecular plastics. It has the following outstanding advantages:
- Waterproof and moisture-proof: Suitable for areas with high humidity such as kitchens and bathrooms, it is not prone to mold or deformation.
- Environmentally friendly and durable: Low formaldehyde content, no odor, and can last for 20-30 years.
- Easy installation: Compared to traditional carpentry, it can save about 30% of construction time and no need for waiting for paint application.
- Aesthetically pleasing and versatile: Supports various styles such as wood grain, channel plates, and relief patterns, easily creating modern minimalist or luxurious effects.Easy maintenance: Only requires a damp cloth wipe for daily cleaning, no frequent maintenance is needed.
Material Selection: Choosing the Right Product is The Foundation of Success
Common indoor types:
Hollow WPC board: Lightweight, soundproof and energy-saving, with high cost-effectiveness. It is recommended for large-scale use (such as the background wall of the living room).
Solid WPC board: Higher hardness, suitable for areas that are frequently touched.
Purchase checklist:
- Thickness: 8-12mm (10mm is the most commonly used).
- Width and length: Choose according to the size of the wall surface. Fluted panels (with grooves) have a more modern look.
- Surface treatment: Matte wood grain, scratch-resistant coating are preferred.
- Accessory packages: Skirtboards (wood strips or light steel), snap-on/cold-pressed screws, inner and outer corner lines, ceiling lines, baseboards, eco-friendly silicone.
- Key certifications: Fire-resistant B1 grade, environmental testing report, no formaldehyde.
Quantity calculation formula: Net area of the wall ÷ Coverage area of the single board × 1.08 (including 5-8% loss). It is recommended to have more of the same batch of boards in stock to avoid color differences.
Pre-installation preparations
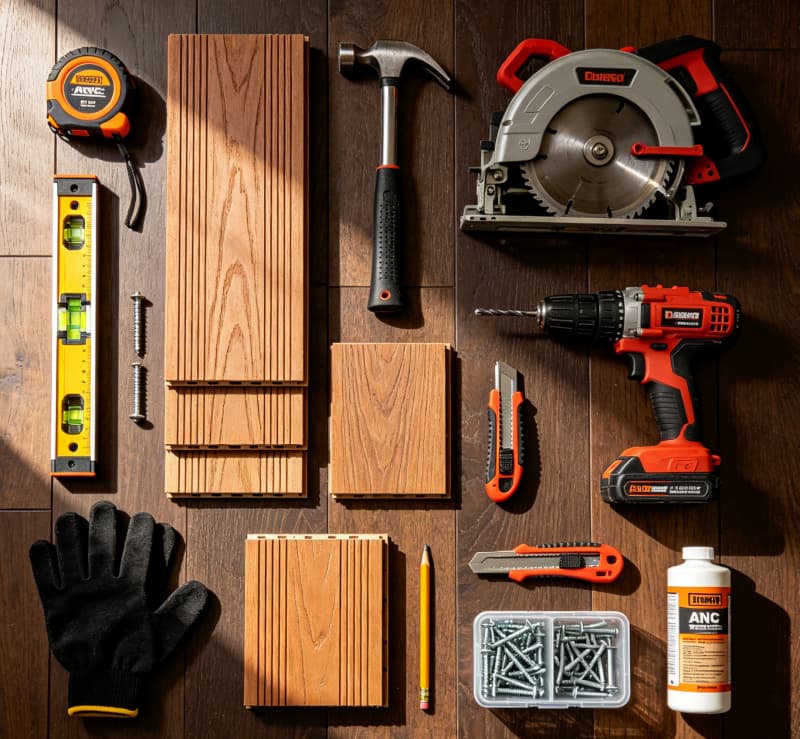
Prepare the following tools to ensure a smooth and efficient indoor installation process of WPC Wall Panel:
- Measuring tools: Laser level (essential), tape measure, level.
- Cutting tools: Fine-tooth electric circular saw or hand saw (with WPC-specific saw blades).
- Fixing tools: Electric drill, impact drill, screw gun.
- Auxiliary tools: Line box, pencil, glue gun, utility knife, sandpaper, safety glasses, gloves, vacuum cleaner.
Inspect the wall conditions
The WPC wall panels are suitable for the following base surfaces:
- Cement wall
- Putty wall
- Gypsum board wall
- Wood base surface
Before installation, ensure that the wall meets the following conditions:
- The wall is dry and free from water seepage
- The surface is flat, with no obvious bulging or cracks
- Clean and free of dust and oil stains
If there is a large difference in wall height, it is recommended to install wooden or light steel framing to level the surface first.
Detailed Installation Steps for WPC Wall Panel in Indoor Applications
Step 1: Measurement and Lining
Before the actual construction, determine the installation direction.
Generally, it is recommended that:
- Vertical installation can enhance the sense of height in the space
- Horizontal installation can make the space appear more spacious
Use a level ruler to draw a baseline on the wall surface to ensure that the first wall panel is level or vertical. The position of the first wall panel directly affects the overall installation effect of the subsequent process. Therefore, it is essential to carefully calibrate.
Step 2: Handling the base layer
If the wall surface is relatively flat, structural adhesive can be directly used for installation. If the wall surface has the following conditions, it is recommended to install the keel first:
- The wall is not flat
- The wall is damp
- Space needs to be reserved for pipelines
- The wall has hollowing
The spacing of the keel is recommended to be controlled between 300 and 400mm, and a level ruler should be used to constantly adjust to ensure that the entire base layer remains flat.
Step 3: Cut the WPC wall panels
Cut according to the wall dimensions.
When cutting, it is recommended to:
- Cut with the surface facing upwards
- Use fine-toothed saw blades
- Move slowly to avoid cracking
- Recheck the dimensions before installing each panel
If you encounter sockets, switches or pipes, measure their positions in advance and make precise holes.
Step 4: Install the first wall panel
Place the first wall panel on the baseline. During the installation process, pay close attention to checking: whether it is vertical, whether it is level, and whether it fits the wall.
Depending on the installation method, you can use: structural adhesive fixation, snap-in fixation, or screw fixation.
After the first wall panel is installed, continue to install the subsequent panels.
Step 5: Install the other wall panels one by one
Insert the next wall panel into the slot of the previous one. After installing 2 to 3 wall panels, recheck:
- Whether it is kept level
- Whether the joints are tight
- Whether the surface is flat.
If any deviations are found, adjust them in time to avoid cumulative errors affecting the overall effect.
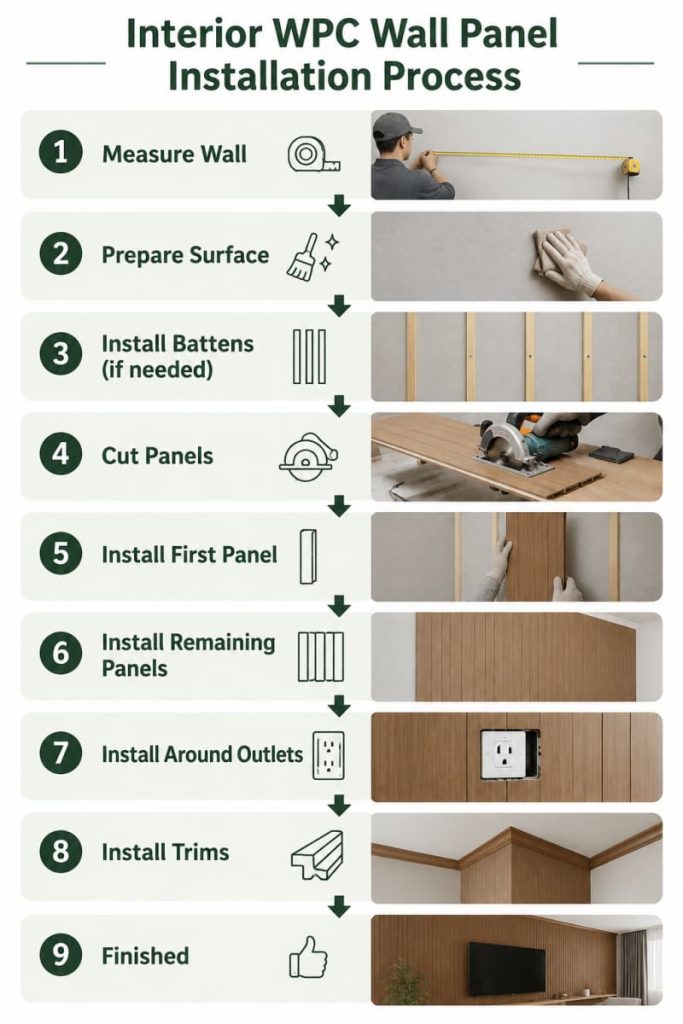
Step 6: Handle the positions of sockets, switches, etc.
The walls usually encounter:
- Sockets Switch
- Network interface
- Air conditioning socket
Before installation, please:
- Accurately measure the position
- Make marks on the wall panel
- Use a cutting tool to cut
- Fix the panel after installation
Do not make the hole too large at one time to avoid affecting the appearance.
Step 7: Install the edge trim
After all the wall panels are installed, various decorative lines need to be installed. Including:
- Interior corner line
- Exterior corner line
- Top edge trim
- Bottom baseboard
- Side edge molding
Finally, use sealant to make local sealing to make the whole appearance more beautiful.
How to Maintain After Installation?
The maintenance of WPC wall panels is very simple. On a daily basis, just pay attention to the following points:
- Use a soft damp cloth to wipe off the dust.
- For stubborn stains, you can use a neutral cleaner.
- Avoid using hard tools like steel wool for cleaning.
- It is not recommended to use strong acid or strong alkali cleaners.
- Regularly check if the edge trim and sealant are loose.
Under normal usage conditions, WPC wall panels can maintain a good appearance and performance for a long time and do not require frequent renovation.
Summary
WPC wall panels have become a popular choice for modern interior decoration due to their advantages such as easy installation, good appearance and durability, and simple maintenance. Whether for residential homes or commercial spaces, as long as the walls are inspected in advance, appropriate tools are prepared, and the construction follows the standard procedures, the installation can be completed quickly.
During construction, key aspects should be emphasized, including the flatness of the base layer, the positioning of the first wall panel, leveling of the joists (if necessary), the provision of expansion joints, and edge finishing. Only by doing each step properly can a flat wall surface, natural joints, and an extended overall service life be ensured.
For users who aim to improve the decoration efficiency and reduce labor costs, indoor WPC wall panels are undoubtedly a wall solution that combines beauty, practicality, and economy. Reasonable installation and regular maintenance can not only create a high-quality interior space but also keep the wall stable, beautiful, and decorative for a long time.